Note:
- In Any module, the first step is Select Instance (Project).
- This is that instance which you are choosing in all modules as a project. After creating the client you will have to create the instance (new exam drive) for that particular client.
- You can also make more than one exam drive for a client.
The New Exam Drive module allows administrators to set up a new examination event by configuring client details, scheduling, and related parameters.
The module consists of three main sections:
- New Exam Drive
- Credentials Configuration
- Help Desk Cofiguration
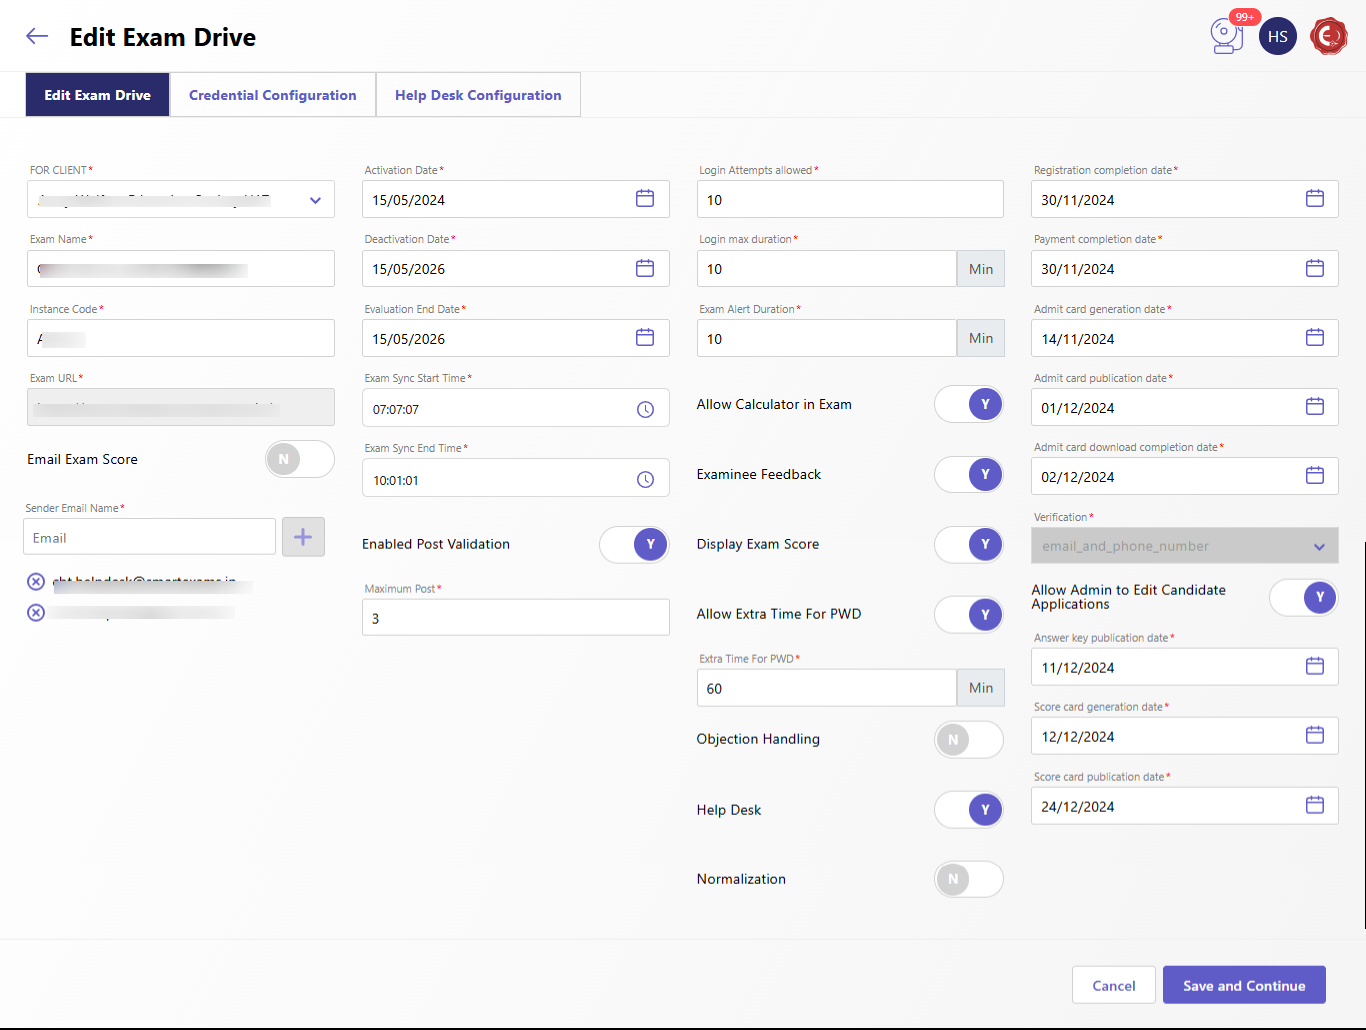
Let's start the process to add the "New Exam Drive":
- Basic Details
- Select the client from the dropdown list
- Enter the name of the exam
- Provide a unique instance code for the exam instance
- Specify the Exam URL where the exam will be hosted
- Scheduling Dates
- Set the activation date when the exam becomes active
- Specify the deactivation date when the drive concludes.
- Enter the Evaluation End Date.
- Set the last date for candidates to register for the exam.
- Define the deadline for payment submissions.
- Admit card Dates:
- Generation Date: Specify when admit cards will be generated.
- Publication Date: Set the date for releasing admit cards
- Download completion Date: Define the final date for downloading admit cards.
- Exam Settings
- Login Attempts Allowed: Specify the number of login attempts candidates can make.
- Login Max Duration: Define the maximum duration (in minutes) a candidate can stay logged in.
- Exam Alert Duration: Enter the duration (in minuted) for system alerts during the exam.
- Exam Sync Times:
- Enter the Start time for exam sync.
- Enter the end time for exam sync.
- Additional Options
- Allow Calculator in Exam: Toggle Yes/No to enable or disable calculators.
- Examinee Feedback: Toggle Yes/No to collect feedback from candidates post-exam.
- Email Exam Score: Toggle Yes/No to decide if scores should be emailed.
- and add more information as mentioned in the ss.
- Verification
- Confirm all configurations before proceeding to the next step. This ensures accurate data entry and scheduling.
- Click Save and Continue to finalize the details and move to the Credential Configuration section.
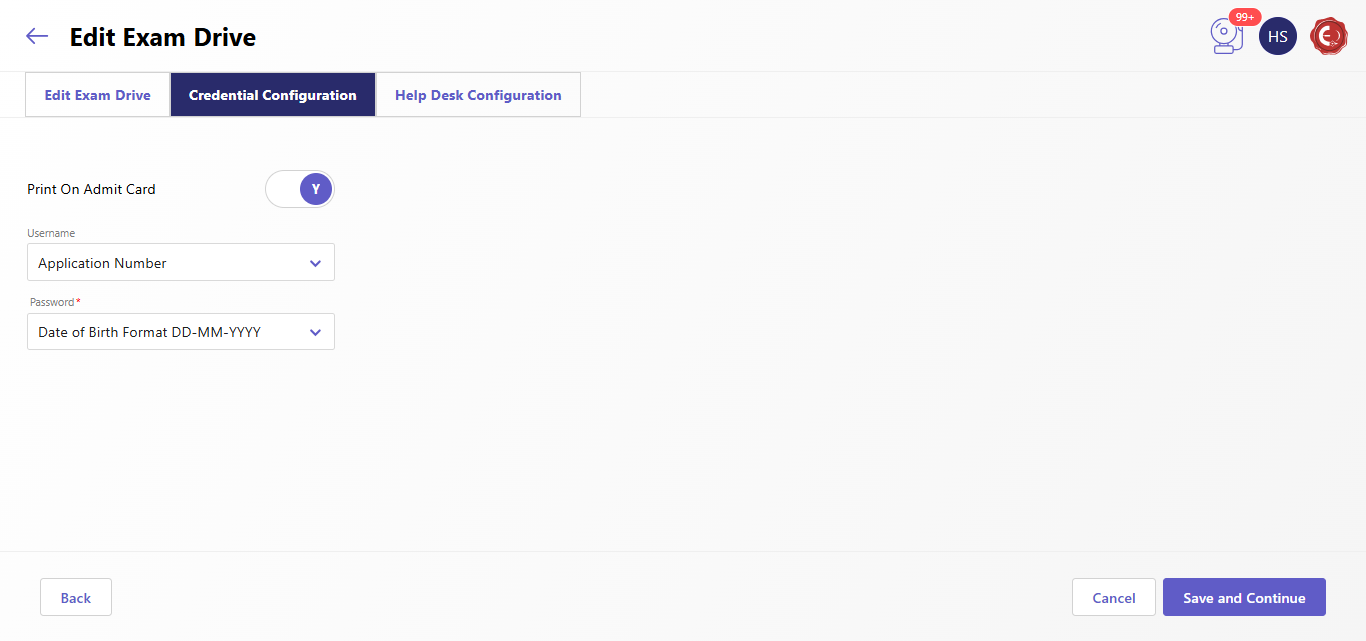
Let's move the second part which is "Credential Configuration" Section:
Credentials Configuration is used to define the credentials required for accessing the "Admit Card."
- Toggle Yes/No to enable or disable the display of credentials on the admit card.
- Choose the username format, such as Application Number or Roll Number.
- Select the password format, such as Date Formats, Application Number, or Random Admit Card Number.
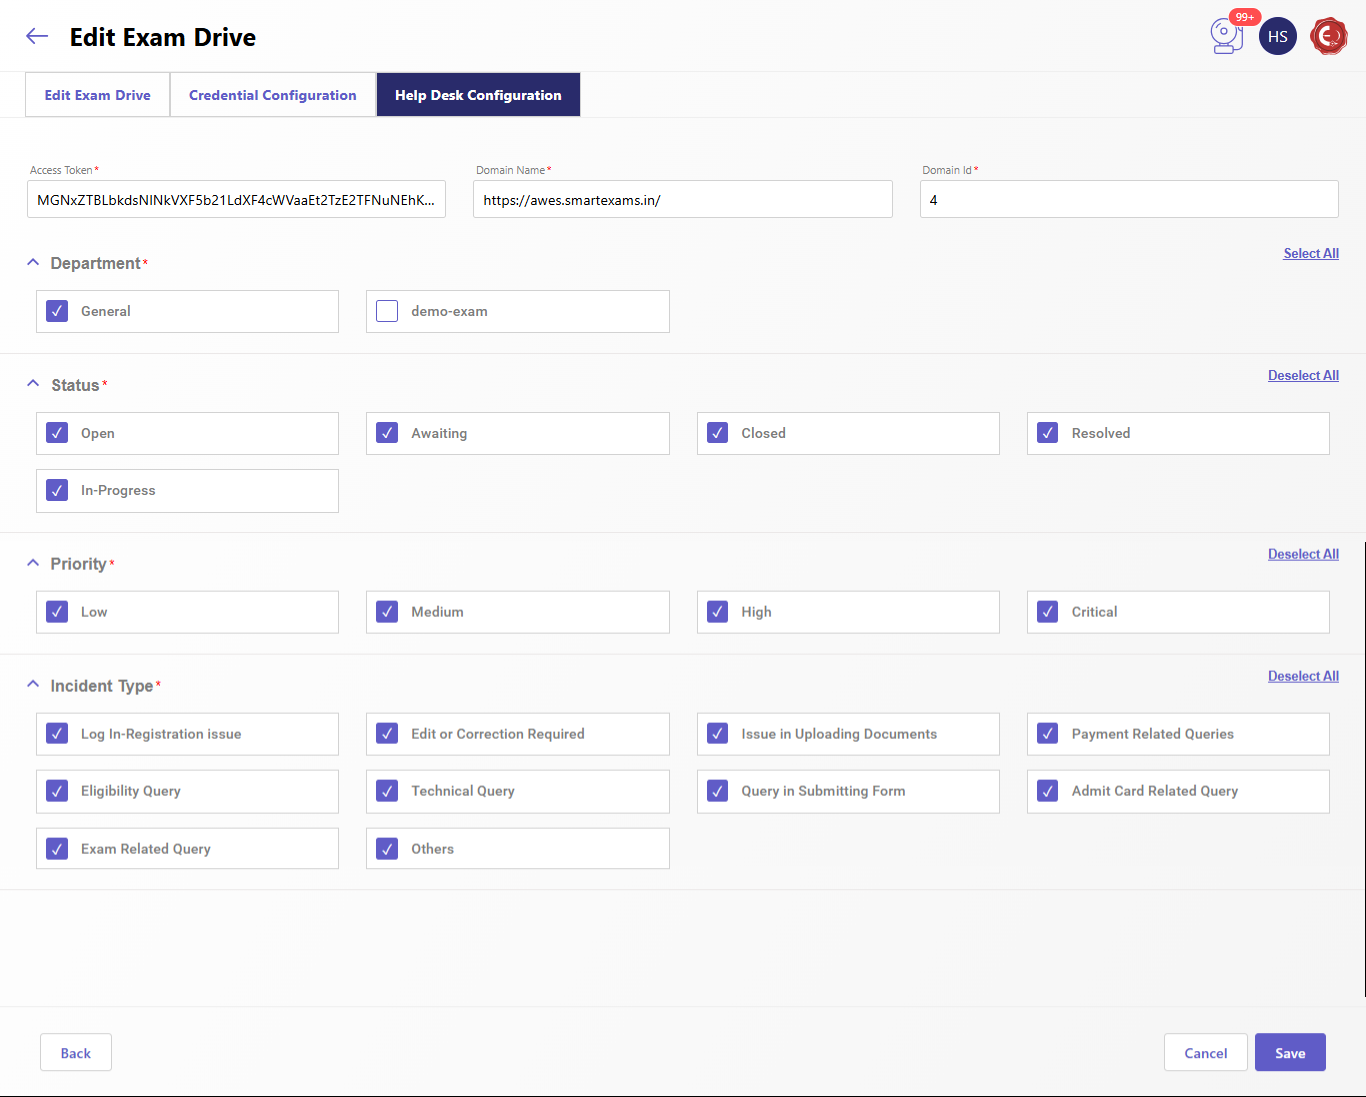
Let's continue the next steps i.e. "Help Desk Configuration".
- Add the help desk configuration.
Created with the Personal Edition of HelpNDoc: Maximize Your Productivity with a Help Authoring Tool