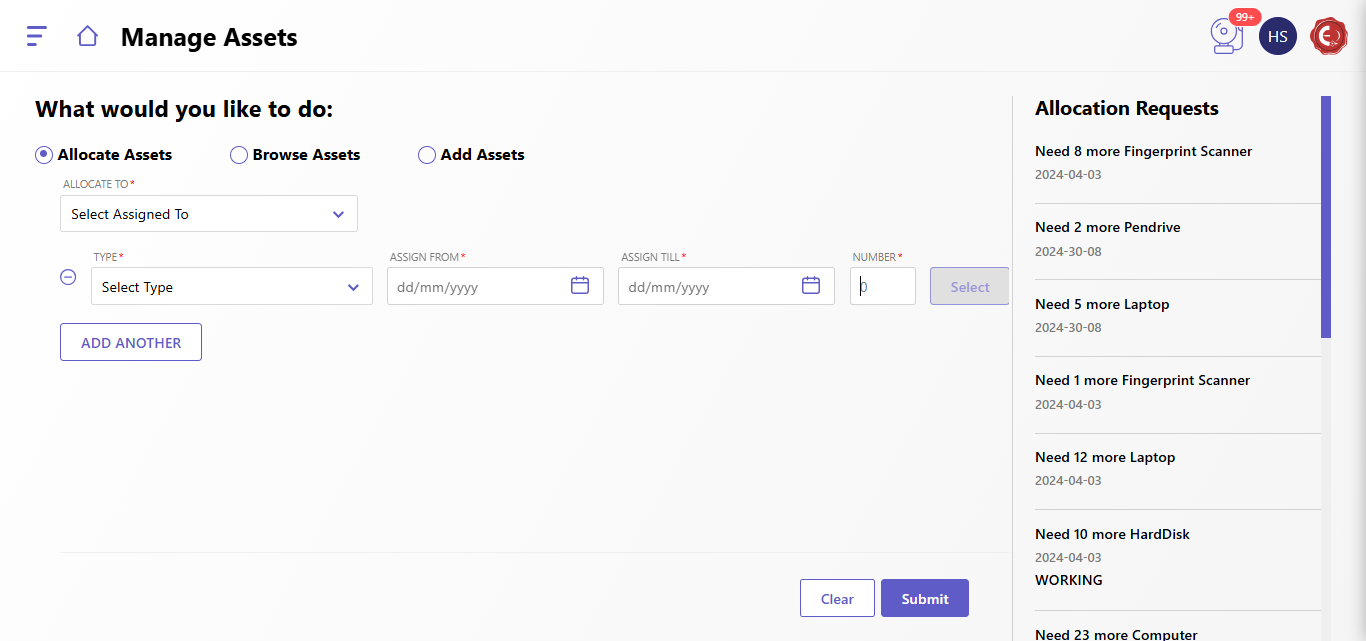
The Manage Assets page is designed to efficiently allocate, browse, and add assets within the system. Below is a guide to navigating and using this interface.
There are three main options available:
- Allocate Assets (default option):
- Allocate assets to a specific individual or group.
- Browse Assets:
- View all existing assets in the system.
- Add Assets:
- Add new assets to the system inventory.
Let's start the process to allocate the assests for the examination:
- Select "Allocate Assets" (default selection).
- Fill in the following fields:
- Allocate To:
Select the individual or group to whom the asset will be assigned.
(Dropdown field with user/group options). - Type:
Select the type of asset from the dropdown menu (e.g., equipment, vehicles, tools). - Assign From:
Enter the start date for the asset allocation using the date picker. - Assign Till:
Enter the end date for the asset allocation using the date picker. - Number:
Specify the quantity of assets to be allocated. - (Optional) Add Another Asset Allocation:
- Click the "Add Another" button to assign multiple asset types in the same operation.
- Submit or Clear:
- Submit: Confirm the allocation request.
- Clear: Reset all entered details.
Allocation Requests Panel
The right side of the screen displays a summary of ongoing or completed allocation requests. This panel allows you to:
- Review active asset allocations.
- Track pending allocations for specific users/groups.
- Monitor the allocated asset quantity and validity.
Other Functions
- Browse Assets: Use this option to view the entire asset inventory. Search and filter options may be available for specific details.
- Add Assets: Select this option to add new items to the inventory. Ensure you provide required details like asset name, type, and quantity.
Created with the Personal Edition of HelpNDoc: Keep Your Sensitive PDFs Safe with These Easy Security Measures