The Roles List displays all the roles in the system. Each role card includes:
- Role Title: Name of the role (e.g., "SemiSuperInstance," "QPA Add Questions").
- Reporting To: The user or administrator the role reports to.
- Users Assigned: The number of users currently assigned to the role.
Actions
Adding a New Role
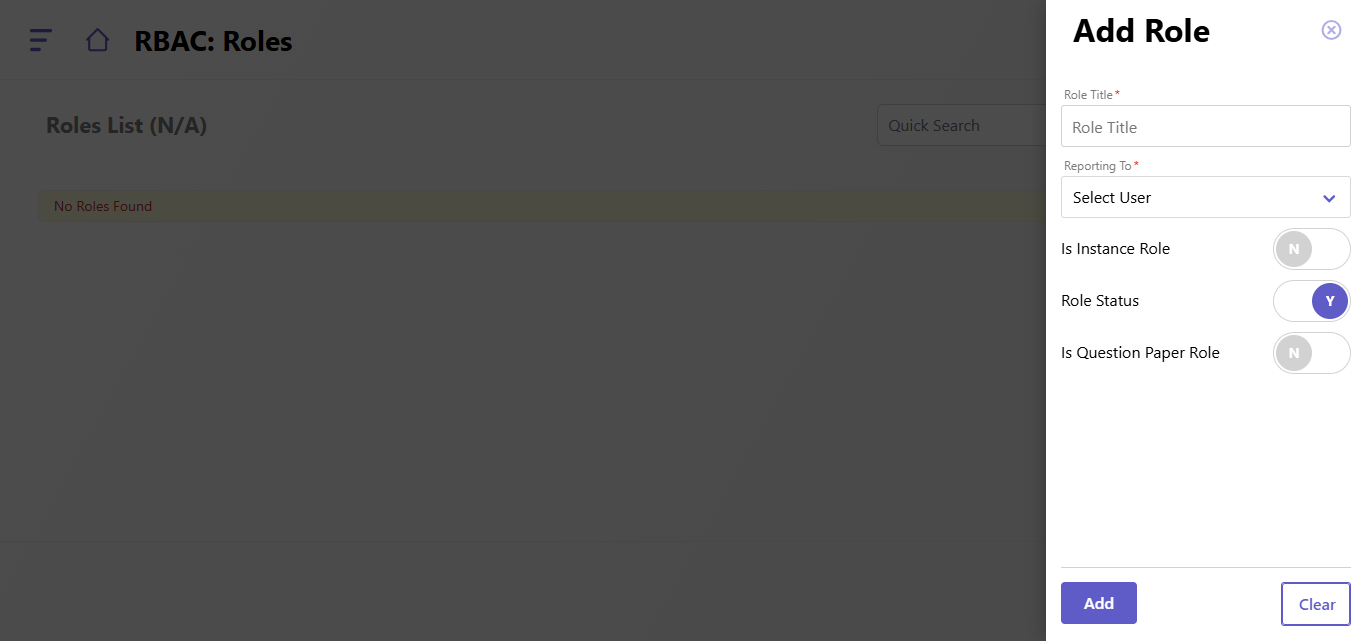
To create a new role:
- Click the Add Role button on the right-hand side.
- Fill out the form with the following details:
- Role Title: Enter a name for the role (e.g., "Instance Admin," "Content Manager").
- Reporting To: Select the user or administrator the role reports to.
- Is Instance Role: Toggle Yes (Y) if the role is specific to an instance; otherwise, leave it as No (N).
- Role Status: Toggle Yes (Y) to activate the role or No (N) to keep it inactive.
- Is Question Paper Role: Toggle Yes (Y) if the role pertains to question paper management; otherwise, leave it as No (N).
- Click Add to save the new role or Clear to reset the form.
Searching and Filtering Roles
- Use the Quick Search bar to find specific roles by name, reporting user, or assigned users.
- Navigate between pages to view more roles using the pagination controls at the bottom of the page.
Managing Existing Roles
- Edit Roles: Click the Pencil Icon on the role card to modify its details. Update the fields as required and save.
- Assign Users: Assign or reassign users to roles via the User Role Mapping feature (refer to the respective guide for details).
Created with the Personal Edition of HelpNDoc: Upgrade Your Documentation Process with a Help Authoring Tool