Center Directory
Note: The Center Directory is used to map specific centers to the corresponding exam city locations selected for a particular exam. This feature ensures that for each exam city chosen, the appropriate examination centers are assigned and linked. By mapping centers to the selected exam cities, the system helps streamline the allocation of candidates to the correct locations during the exam scheduling process. This step is essential to maintain an organized and efficient exam setup, ensuring that candidates are directed to the proper centers based on their selected preferences.
Let's start the process to create the Center directory, following are the steps:
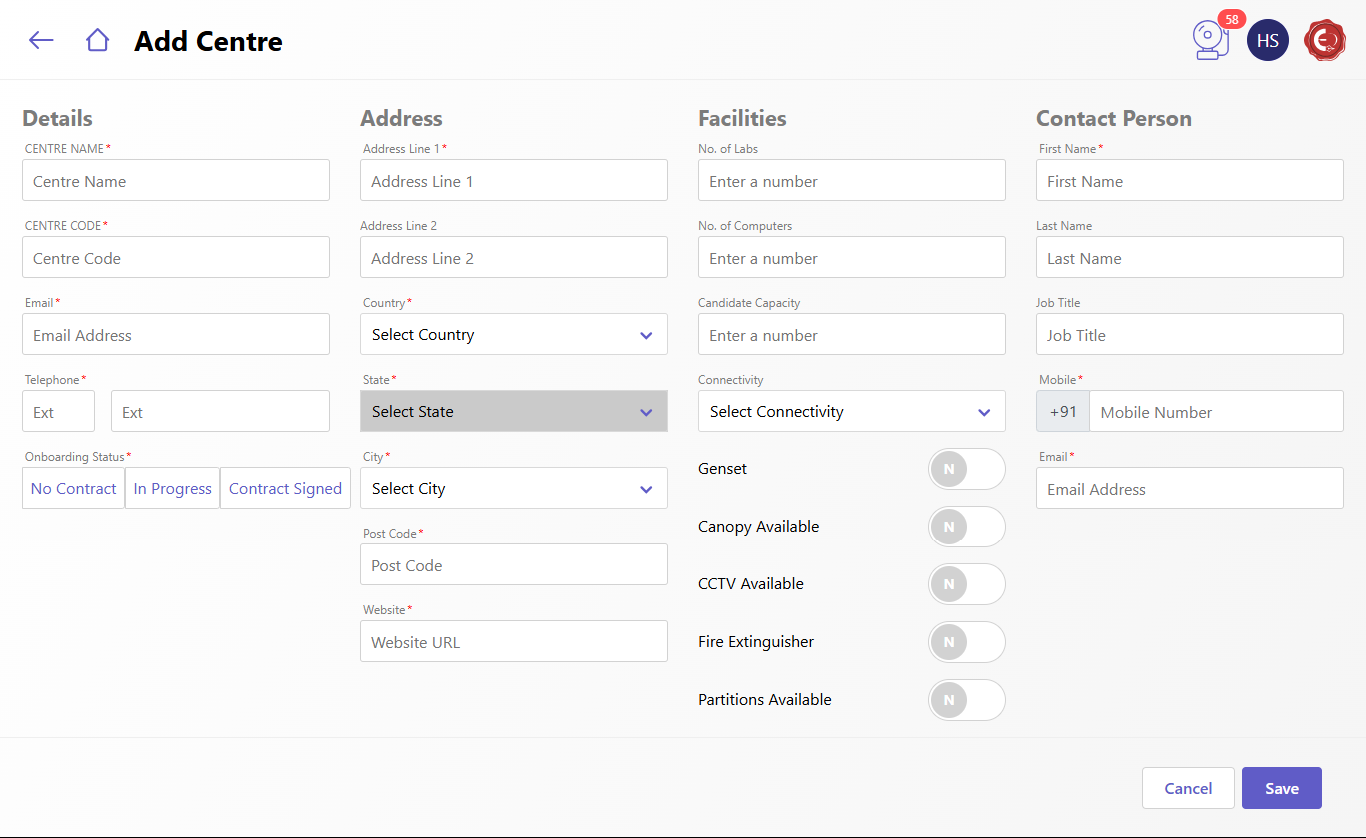
The Examination Center Directory is a comprehensive database or listing of all authorized examination centers. It includes key information about each center, such as:
- Center Name: The official name of the examination center.
- On boarding Status indicates the current stage of on boarding for each examination center. The statuses include:
- No Contract: The center has not yet submitted a contract or started the on boarding process.
- In Progress: The center is actively working through the on boarding steps, such as documentation, compliance checks, and resource setup.
- Contract Signed: The on boarding process is complete, and the center has signed the contract, making it fully ready and authorized for examination activities.
- Location: Address and geographic details for easy access and planning.
- Center Code: A unique identifier assigned to each center.
- Contact Information: Details of center coordinators or administrators.
- Capacity: The number of candidates each center can accommodate.
- Available Resources: Information on facilities and assets, such as labs, computers, and other examination materials.
- This directory is used for examination planning, candidate allocation, and resource management across examination centers.
- After filling this information, click on "Save" button.
- If changes are needed after saving the details, an edit option is available. Click on the center name to open an edit popup where modifications can be made.
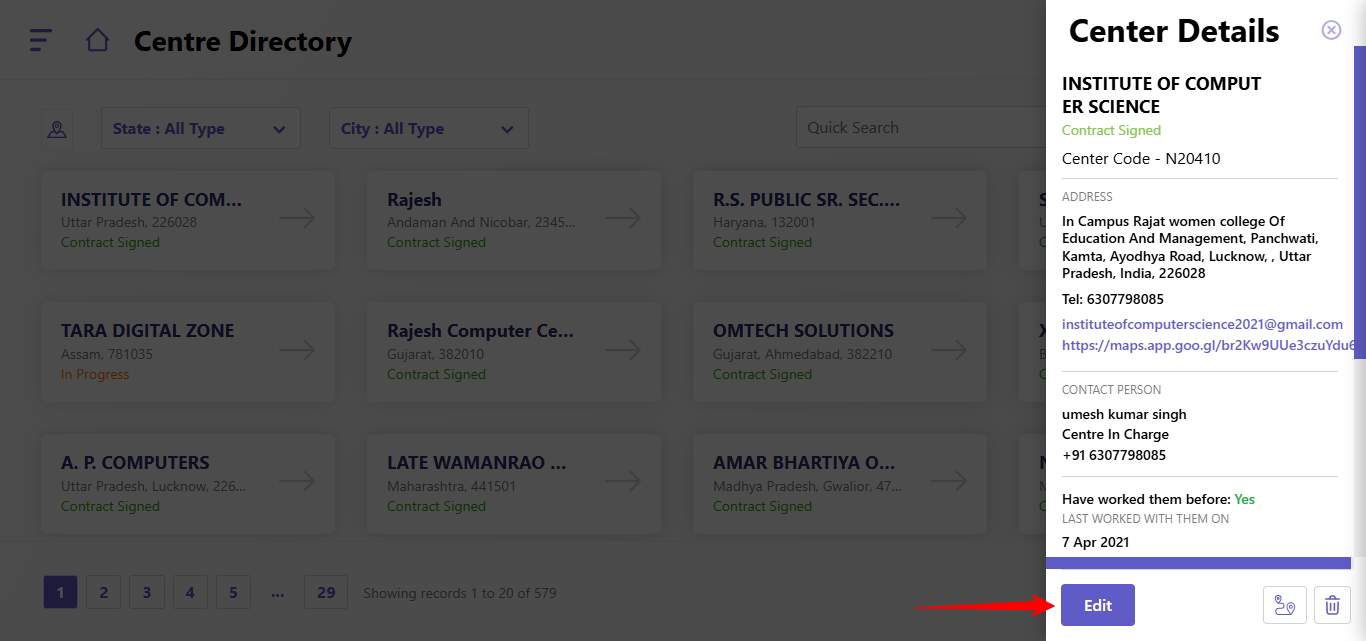
- There is an option to share the center location on email, click on
 icon on "Edit Popup", Then enter then the email to whom you want to share the location and then Send.
 - A delete option is available to remove any incorrectly created center directory.
Created with the Personal Edition of HelpNDoc: Maximize Your PDF Protection with These Simple Steps